
This guide builds directly on the Morph 4K Vanilla Guide and assumes your signal path is already correct, resolution and scaling are properly configured, and the Morph 4K is outputting a clean and stable 4K image. It also assumes that all default presets and masks supplied with the Morph 4K are installed and available. Nothing in this guide is required. Scanlines and masks do not correct an image, they shape how it is perceived. Their purpose is visual refinement rather than technical accuracy. If the base image is not already correct, these effects will not improve it. We will not focus on which masks are best, as this is a subjective choice that varies with display characteristics, viewing conditions, and individual taste.
Click here to read more about how scanlines and masks work. If you prefer to jump straight into setup, you can skip ahead to the walkthroughs. But keep in mind that results vary from screen to screen, and scanlines work best with native 240p content.
What scanlines actually are
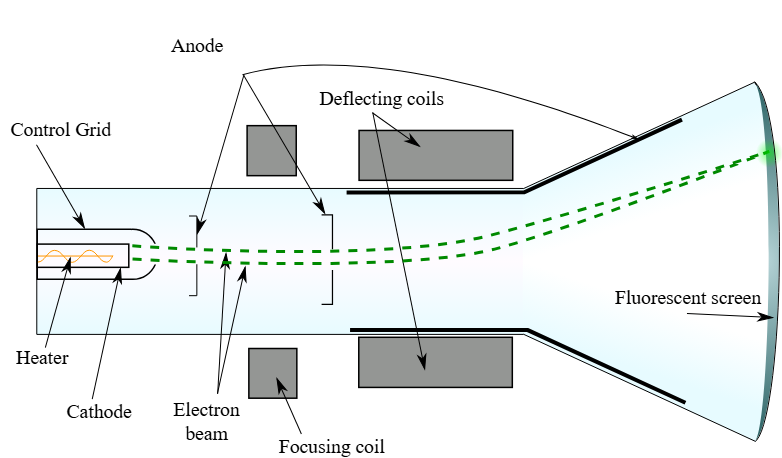
Scanlines originate from how CRT displays drew images line by line using an electron beam. Between these passes, small gaps existed, creating visible horizontal separation between rows of image data. This behavior was always present and directly influenced how low-resolution graphics were created.
During the 240p era, artists worked while viewing their games on CRTs and designed graphics with scanline separation, phosphor bloom, and analog blending in mind. Color choices, dithering, shading, and sprite proportions were often chosen specifically because they resolved correctly on a CRT. What appears harsh or overly sharp on a modern flat panel was never meant to be seen as raw pixels.
In a digital context, scanlines do not add detail. They introduce controlled brightness modulation between rows of pixels, restoring vertical rhythm and structure that original content assumed would be present. Because scanlines reduce overall brightness and contrast, they should always be applied conservatively.
Scanlines, brightness, and HDR
Scanlines inherently reduce image brightness. The Morph 4K can partially compensate for this using HDR output, which allows higher peak brightness to offset the light lost to scanline modulation. How effective this is depends heavily on the display. Differences in panel technology, peak brightness, and tone mapping mean HDR compensation can look well-balanced on one screen and too strong or too weak on another. HDR should therefore be treated as a tuning aid rather than a universal solution.
When scanlines make sense
Scanlines are most effective with native 240p content and other material that was designed around visible line structure. For 480i sources, once the Morph 4K deinterlaces the signal into a progressive image, the original field-based line structure is no longer preserved. As a result, scanlines often become very subtle or effectively invisible. For higher-resolution output such as 480p and above, scanlines tend to reduce clarity without providing meaningful benefit.
What masks actually are
Masks simulate the phosphor layout of a CRT display. Real CRTs did not display square pixels but repeating patterns of colored phosphors that influenced color blending, edge behavior, and perceived sharpness. Artists relied on this behavior, often using dithering patterns that blended naturally on CRTs but appear noisy on modern displays.
A digital mask does not recreate a CRT, but it can restore some of this intended color interaction by introducing fine-grained texture at the sub-pixel level. Mask behavior improves as output resolution increases. Higher pixel density allows mask patterns to be rendered more subtly and consistently, reducing interference with the image. For this reason, a 4K output is recommended when using masks on the Morph 4K.
How scanlines and masks interact
Scanlines and masks affect different aspects of the image. Scanlines shape vertical structure and brightness, while masks influence color blending and surface texture. When combined carefully, they can complement each other, but because both reduce brightness and contrast, each should be set weaker than if used alone. If either effect is clearly visible during gameplay, it is likely too strong.
Display dependency and tuning
The appearance of scanlines and masks varies significantly depending on screen size, panel type, resolution, sub-pixel layout, and viewing distance. A setting that looks subtle on one display may look overly strong on another. Because of this, there is no single correct intensity or strength value.
Scanline setup walkthrough
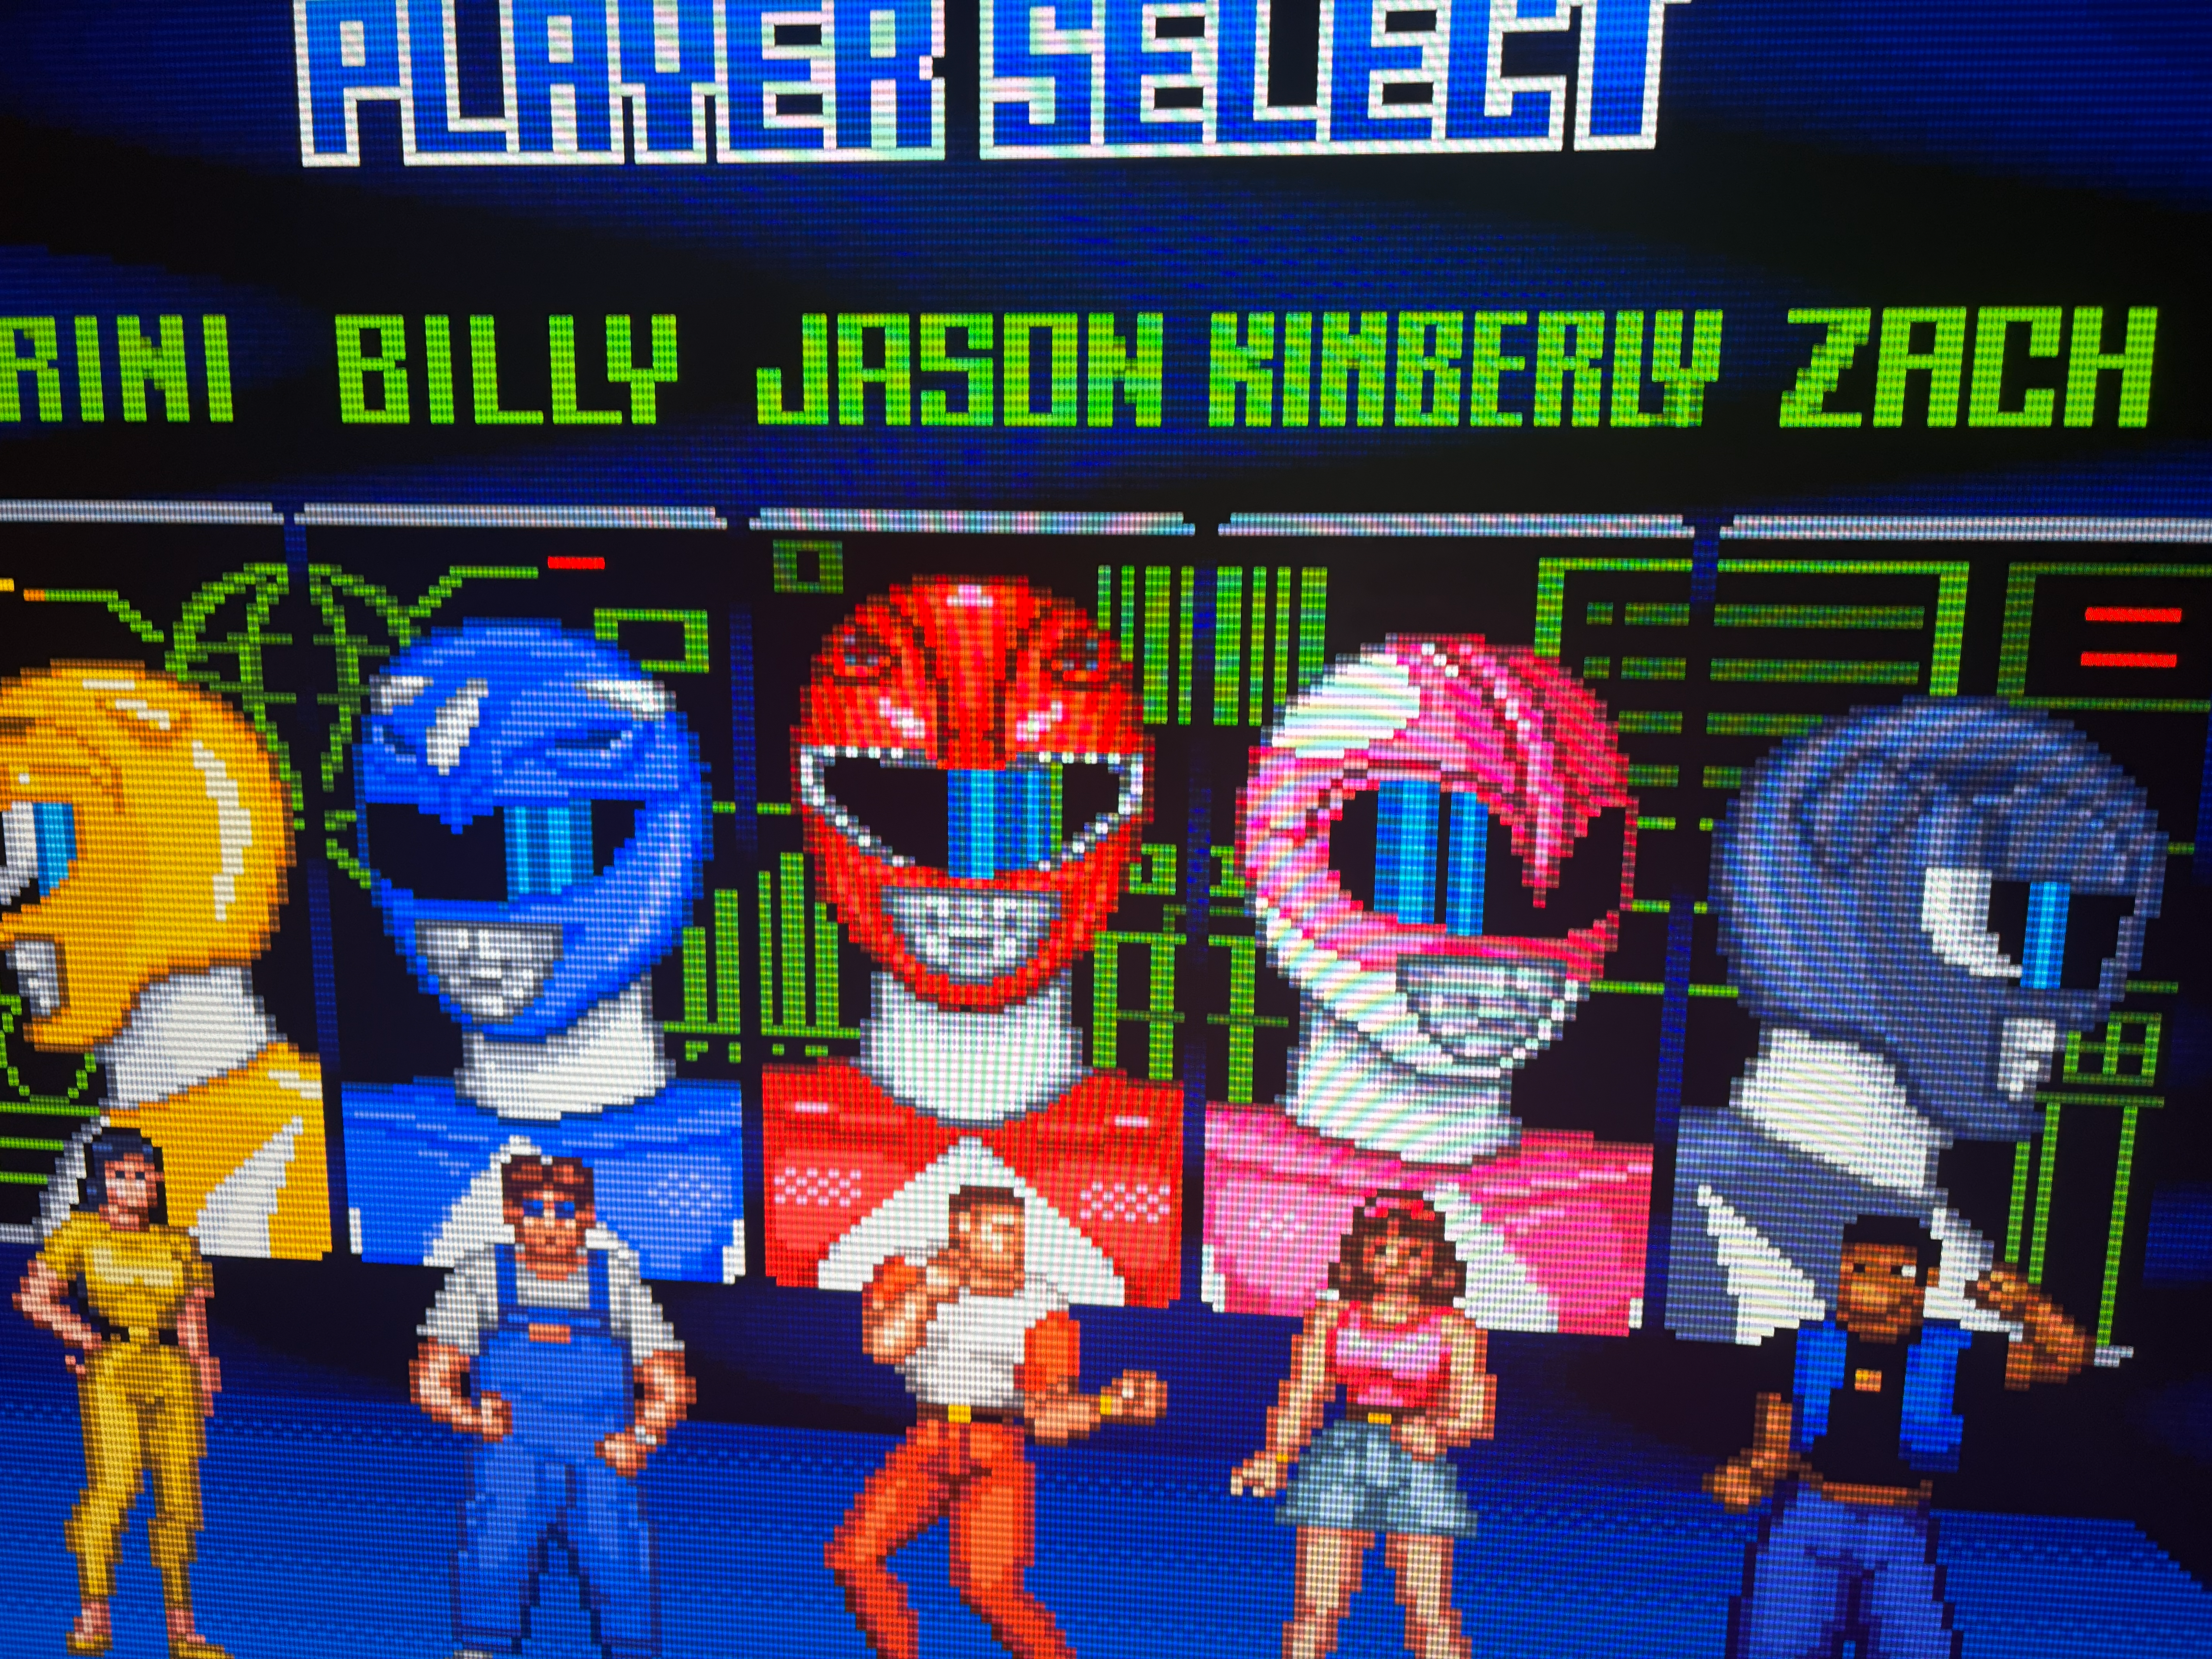
For the sake of this tutorial, start a SNES game and pause it on a visually busy screen with a lot of on-screen detail. Crowded scenes make it easier to judge how scanlines affect brightness, contrast, and structure, allowing you to fine-tune the effect to your preference. Once the game is running on the desired screen, open the Morph 4K on-screen display menu.


In the menu, navigate to Video and then Retro FX. In most cases, you will only want to use horizontal scanlines (H. Scanlines). This is because the vast majority of classic console and arcade systems were drawn line by line in the vertical direction, making horizontal scanlines the natural match for how the original image was displayed on a CRT. Horizontal scanlines reinforce vertical structure without interfering with sprite width, text clarity, or UI readability.
Vertical scanlines, or a combination of horizontal and vertical scanlines, are generally only useful in specific situations. Vertical scanlines may add structure to content with strong vertical repetition or column-based detail, such as certain arcade titles or stylized visuals. Using both horizontal and vertical scanlines together can also be effective as a deliberate stylistic choice or for very low-resolution content where additional structure helps break up a flat digital appearance. These cases are the exception rather than the rule and should be approached conservatively.
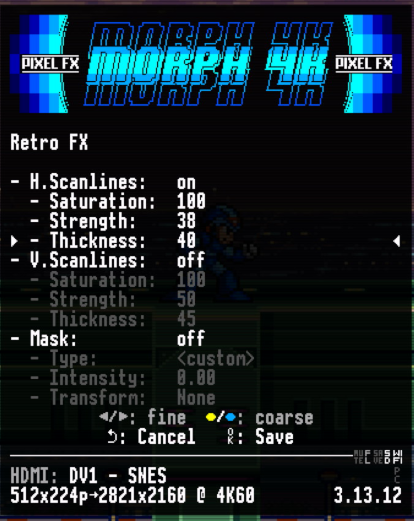
Enable H. Scanlines and adjust saturation, strength, and thickness gradually until the image gains structure without becoming noticeably distracting. If the effect is immediately obvious during gameplay, it is likely set too strong. The goal is to support the image rather than draw attention to the processing.
You will notice that the overall image brightness decreases as soon as scanlines are enabled. This is expected behavior, as scanlines deliberately reduce light output to create line separation. If your TV or monitor supports HDR, this loss in brightness can be partially compensated for by enabling HDR on the Morph 4K. To enable HDR10, open the Morph 4K on-screen menu, navigate to Video, then Color Correction, and set it to HDR10. Keep in mind that HDR behavior varies between displays, so the visual result may differ depending on your screen’s brightness capabilities, tone-mapping behavior, and panel technology.

Mask setup walkthrough
Like the scanline section earlier in this guide, begin by launching a SNES game and pausing it on a visually busy screen with plenty of on-screen detail. Using the same type of scene makes it easier to compare how scanlines and masks behave and how changes affect the image.


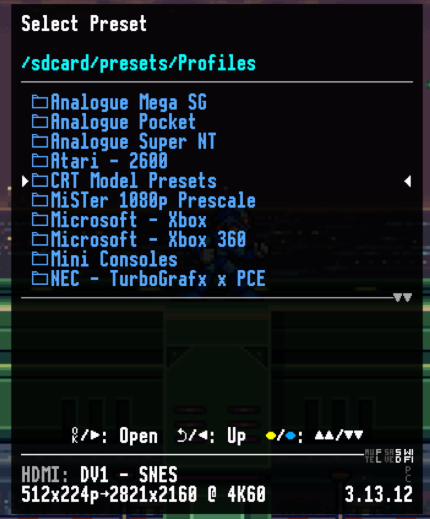
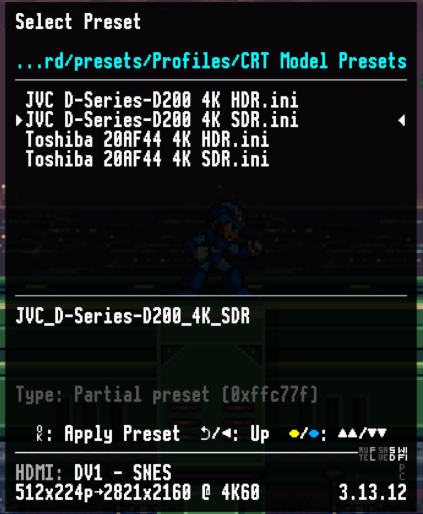
Open the Morph 4K on-screen display menu and navigate to Presets. As mentioned at the beginning of this guide, it is assumed that all default presets are installed. For the purpose of this walkthrough, select a preset that already combines scanlines and a mask. Go to Browse Presets, then Profiles, then CRT Model Presets, and select JVC D-Series D200 4K SDR or JVC D-Series D200 4K HDR, depending on your output mode.
Close the on-screen menu and take a moment to observe the image before making any adjustments.
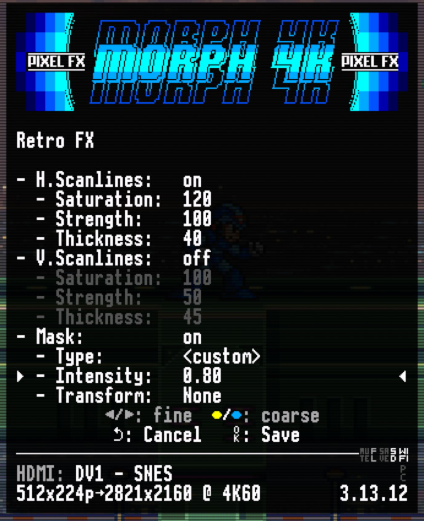
Next, open the on-screen menu again and navigate to Video, then Pixel FX. Here you will see that this preset uses both horizontal scanlines and a mask. Adjust the mask intensity gradually and, if needed, fine-tune the scanline settings as well. Observe how changes to the mask affect color interaction and texture, and how scanlines influence brightness and structure.
Not all presets that use a mask also enable scanlines by default, but scanlines can always be enabled manually if desired. This preset is used purely as an example. Feel free to explore the full range of presets the Morph 4K offers. Now that you have a basic understanding of how scanlines and masks work, experimenting with different presets becomes far more intuitive.
Keep in mind that a mask may initially appear distorted or overly strong when first enabled. By adjusting mask intensity, scanline strength, and related settings, it can usually be brought into balance. Presets are often created on different displays under different viewing conditions, which is why results can vary from one setup to another.
Saving your customized scanlines and masks as a preset
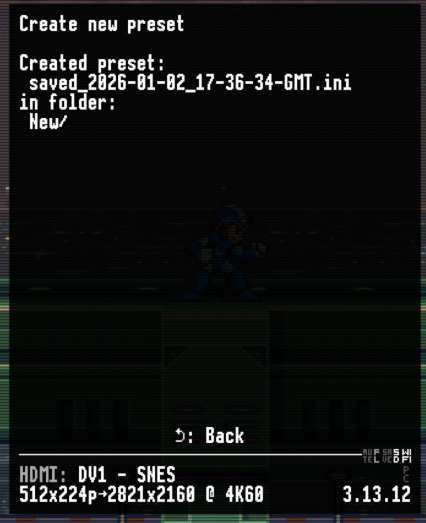
Once you are happy with your scanline and mask adjustments, you can save them as a custom preset so they can be recalled easily later. Open the Morph 4K on-screen display menu and navigate to Presets. From there, choose the option Create new preset. Your preset will be saved on the SDcard.

Saving your configuration as a preset ensures that your preferred scanline and mask settings remain consistent across sessions, without the need to manually reconfigure them each time you adjust other video settings or switch between profiles.
This also allows you to experiment freely, knowing you can always return to a known good configuration. Presets may look slightly different on other displays, but saving your settings provides a reliable baseline that can be refined further if needed.
Auto Presets
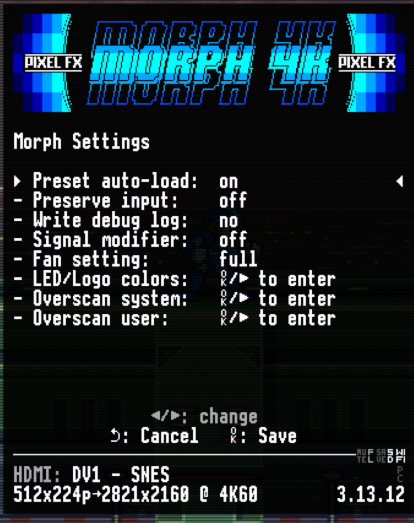
Before using Auto Presets, first make sure that Preset Auto-Load is enabled. Open the Morph 4K on-screen display menu, navigate to System, then Morph Settings, enable Preset Auto-Load, and restart the Morph 4K from the main menu. The reboot is required for the change to take effect.


Auto Presets allow the Morph 4K to automatically apply a selected preset when a specific input, profile, or condition is active. This removes the need to manually switch presets when changing systems or use cases and helps ensure that the correct scanline and mask configuration is applied consistently.
In the case of MiSTer FPGA, when Direct Video is enabled, the active core information is sent over HDMI to the Morph 4K. This allows the Morph 4K to detect which core is currently running and makes it possible to automatically load a different preset per core. This is particularly useful when switching between systems with very different visual characteristics, such as 8-bit consoles, 16-bit consoles, and arcade cores, without needing to manually adjust settings.
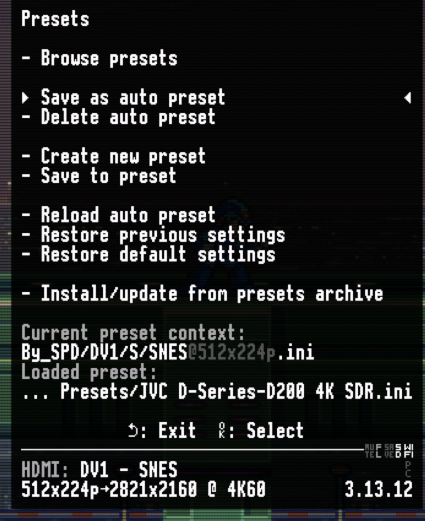
To assign an Auto Preset, first make sure the desired core or game is running on the MiSTer. The Morph 4K requires an active signal so it can associate the preset with the correct core or game. Once the core or game is running, open the Morph 4K on-screen display menu and navigate to Presets.
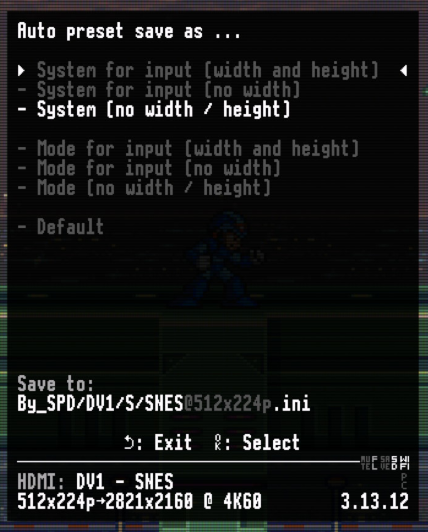
Apply the preset you want to use as an Auto Preset. After confirming that the preset is active, select Save as Auto Preset. You will be presented with several save options. Selecting System [no width or height] will apply the preset automatically whenever that core is launched. If you want the preset to load only at a specific resolution, you can include width and height in the assignment. This can be particularly useful when creating separate presets for content such as 480i games that benefit from different settings.
Optionally, you can assign an Auto Preset to the MiSTer main menu using the default.ini. This allows the Morph 4K to load a clean, neutral preset whenever you exit a core or game and return to the MiSTer menu, ensuring the menu is always displayed without scanlines or masks applied.
Final thoughts
Scanlines and masks are perceptual tools, not accuracy tools. Their purpose is to respect the assumptions under which classic games were created while adapting them to modern displays. Because every screen behaves differently, careful tuning is part of the process rather than a flaw. When set correctly, these effects fade into the background and allow the game itself to remain the focus.
I think vertical scanlines make sense only for the games that are rotated at the source. So vertical arcade games or tate mode games on crts on consoles that are rotated before coming to the morph by an emulator. in that case horizontal scanlines are wrong and vertical should be on. Then yes you can set your scaler as you want.
I wasn’t aware how to setup those auto presets.
Thanks, I again learned something new!
This was an amazing guide! I’ve had a Morph for almost two years and never knew half of this.