

The Morph 4K is a modern upscaler designed for accuracy, flexibility, and proper 4K output from retro (based) hardware. When paired with MiSTerFPGA, it offers a noticeable step up from basic TV scaling while keeping the original video output intact. This guide focuses on the baseline experience, clean 4K upscaling with no scanlines, no CRT masks, and no stylistic enhancements. The goal is to establish a neutral and reliable foundation that you can confidently build on later.
What this guide covers:
This article focuses on preparing MiSTerFPGA correctly for use with the Morph 4K, achieving stable and accurate 4K output, and understanding the key settings that matter for a clean starting point. It intentionally does not cover scanlines, CRT masks, artistic presets, heavy filtering, or per-system tuning, as those topics are best explored once the fundamentals are in place.
Hardware setup:
The physical setup is straightforward. Connect the MiSTerFPGA HDMI output to the Morph 4K HDMI input, then connect the Morph 4K HDMI output to a 4K TV or monitor. Make sure you are using good-quality HDMI cables, that your display supports 3840×2160 at 60Hz (atleast HDMI 2.0), and that the Morph 4K firmware is up to date before continuing.
Preparing MiSTerFPGA for the Morph 4K
Before configuring the Morph 4K itself, MiSTer needs to output a clean and predictable video signal. This avoids unnecessary scaling and ensures the Morph 4K is responsible for all image processing. For a vanilla 4K setup, one MiSTer settings matter most, Direct Video.
What Direct Video actually does:
By default, MiSTer converts each core’s video output into a very standard HDMI signal so modern TVs and monitors can display it easily. This process includes internal scaling and timing adjustments. When Direct Video is enabled, MiSTer takes a different approach. Instead of scaling or normalizing the image, it outputs a signal that stays much closer to the original core resolution, timing, and refresh behavior, with very little processing happening inside MiSTer. In practical terms, standard HDMI output prioritizes display compatibility, while Direct Video prioritizes accuracy and external processing. This is exactly what external scalers like the Morph 4K expect.
One important side effect of this is that MiSTer’s main menu will not look great. The menu is rendered at a fixed resolution and is not designed with Direct Video in mind, so it can appear uneven, poorly scaled, or generally rough. This is completely normal and is simply a byproduct of how Direct Video works. It is worth noting that this can be corrected with a manual entry in the MiSTer.ini file, allowing the menu to display more cleanly even with Direct Video enabled. This adjustment does not affect gameplay and will be shown later in this guide.
It is also important to note that, at the time of writing, Direct Video does not work correctly with PC-style cores such as ao486 and X68000. When Direct Video is enabled, these cores may fail to display correctly or not output video at all. This is a known limitation and not an issue with the Morph 4K itself. A workaround for these cores will be covered later in this guide.
This does not affect gameplay on supported cores. Once a core is loaded, the video output behaves exactly as intended and benefits fully from Direct Video when paired with an external scaler like the Morph 4K.
Why you want Direct Video for the Morph 4K:
With Direct Video enabled, the Morph 4K receives a cleaner, more native signal, scaling happens once in one place, original timing behavior is preserved more accurately, and results are more consistent across different cores. Even without advanced features enabled, this immediately improves stability and predictability.
Editing the MiSTer.ini
Using the ini_settings script:
If you prefer not to edit MiSTer.ini manually, the same settings can be applied directly on the MiSTer itself using the ini settings script.
From the MiSTer main menu, launch the ini settings script and change the following option:
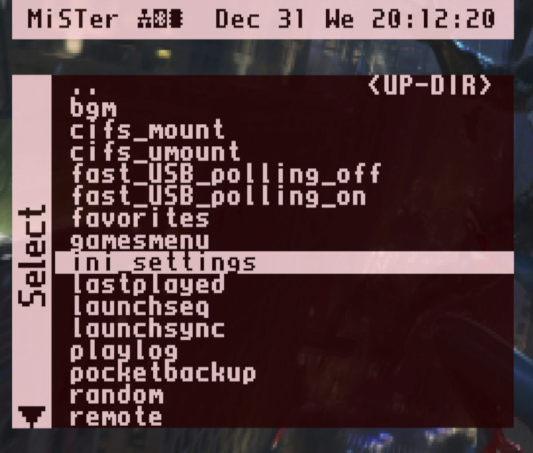
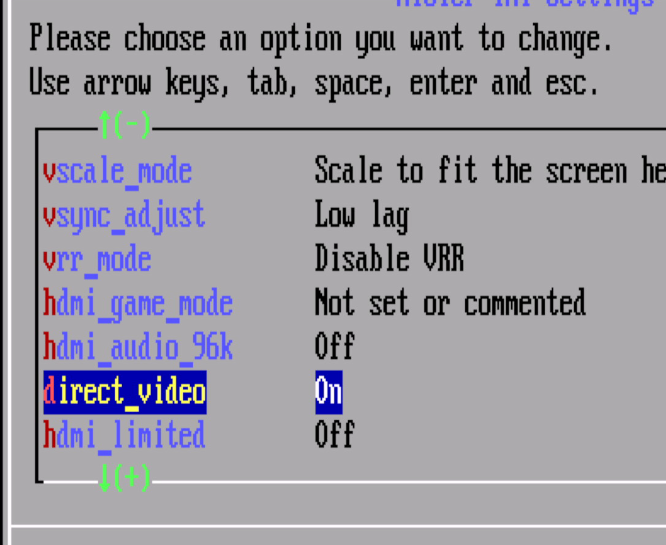
Turn on Direct Video
Once applied, exit the script and reboot your MiSTerFPGA. The result is identical to editing the MiSTer.ini by hand and achieves the same clean baseline for use with the Morph 4K.
Manually:
Power down your MiSTerFPGA, remove the SD card, insert it into your PC, and backup the file named MiSTer.ini located in the root of the SD card and then edit it using a plain text editor such as Notepad or Notepad++.
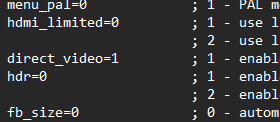
To enable Direct Video, locate the following line:
direct_video=0
Change it to:
direct_video=1
If this line does not exist in your MiSTer.ini, it can safely be added anywhere in the file. Save the file and eject the SD card properly before reinserting it into your MiSTer.
N64 core specific settings:
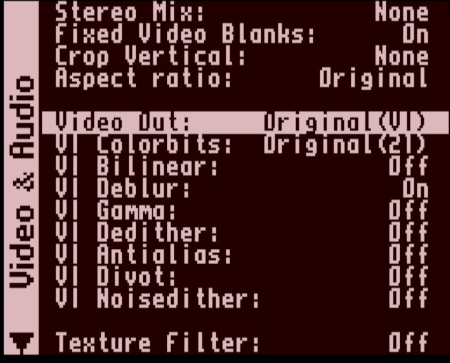
When using the Nintendo 64 core with the Morph 4K, a few additional adjustments are strongly recommended to keep the signal as clean and predictable as possible. If you have Clean HDMI enabled in the N64 core, it should be disabled. Clean HDMI does not work with Direct Video enabled, and attempting to use both at the same time will result in strange video artifacts or, in most cases, no video signal at all. Since this guide recommends Direct Video for use with the Morph 4K, Clean HDMI should always be turned off.
It is also best to disable all in-core video filters that are enabled by default. These filters were designed to intentionally mimic the Nintendo 64’s notoriously poor original video output, including blur and softness introduced by the real hardware’s analog signal path. While this approach makes sense when outputting directly over HDMI, it becomes unnecessary and often counterproductive when using a high-quality external scaler like the Morph 4K. For a vanilla Morph 4K setup, the goal is to let the N64 core output a clean, unfiltered signal, avoid intentional degradation at the core level, and let the Morph 4K handle all scaling and presentation. This keeps the N64 experience consistent with other cores and avoids stacking multiple layers of processing.
Fixes for MiSTer Menu and Direct Video incompatible cores:
As mentioned earlier, Direct Video can cause the MiSTer main menu to look rough and does not work correctly with certain PC-style cores such as ao486 and X68000. These issues can be addressed by selectively disabling Direct Video for specific components while keeping it enabled globally for everything else.
It is important to note that these per-core and menu overrides cannot be applied using the ini settings script. They must be added manually to the MiSTer.ini file, as the script only exposes global options and does not support section-based overrides.
To do this, add the following entries to the very bottom of your MiSTer.ini file:
[menu]
direct_video=0

[arcade_vertical]
direct_video=0

[X68000]
direct_video=0

[ao486]
direct_video=0
This forces the MiSTer main menu and the listed cores to fall back to standard HDMI output, restoring a clean and usable image while keeping Direct Video enabled for all other supported cores. Gameplay on supported cores remains unaffected and continues to benefit from Direct Video when routed through the Morph 4K.
Once saved, reboot your MiSTerFPGA for the changes to take effect.
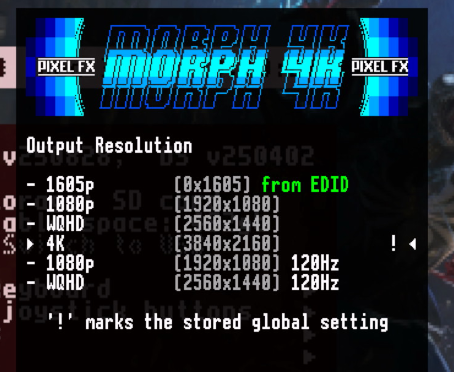
Initial Morph 4K configuration
With MiSTer configured correctly, it’s time to set up the Morph 4K itself. For a vanilla experience, keep things simple by setting the output resolution to 3840×2160, leaving the scaling mode at its default or neutral setting, preserving the original aspect ratio, and keeping filtering minimal or disabled. Even with default settings, the Morph 4K already offers a clear improvement over most built-in TV scalers.
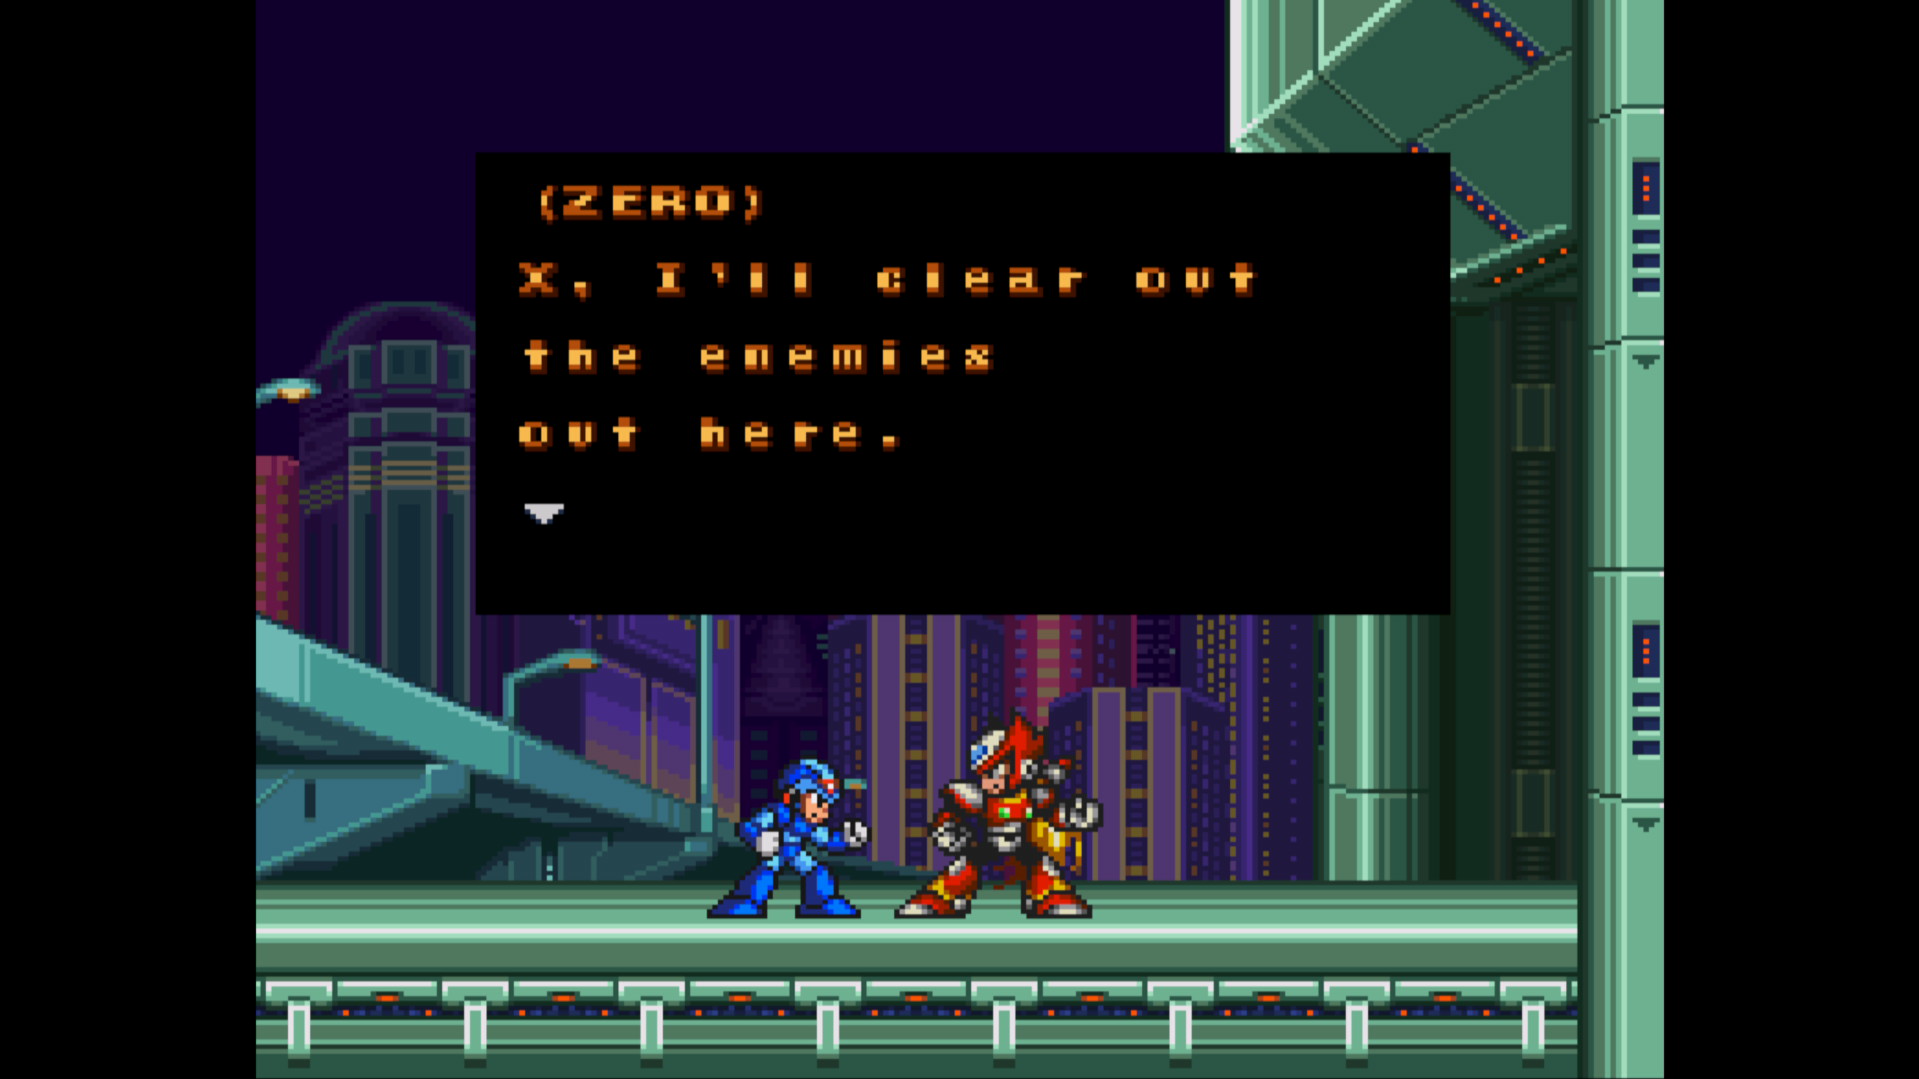
What vanilla 4K looks like:
With no scanlines or filters enabled, the Morph 4K delivers clean, well-defined pixel edges, stable scaling across varying source resolutions, reduced shimmer compared to TV scaling, and a modern, neutral presentation. Some games may appear sharper or more raw than you remember, which is normal. This is the unfiltered output of classic hardware scaled cleanly to 4K.
Modern TVs and monitors can still influence the image. For best results, enable Game Mode on your display if available, disable extra sharpening and noise reduction, and turn off motion smoothing or image enhancement features. The goal is to let the Morph 4K do the work, not the display.
The Morph 4K is powerful, but flexibility comes with choices. This vanilla setup prioritizes accuracy and stability, avoids subjective enhancements, and creates a dependable baseline for future experimentation. Once you are comfortable here, scanlines, masks, and per-system presets become far easier to dial in.
What’s next
This guide focused on establishing a clean and reliable starting point for using the Morph 4K with MiSTerFPGA. Scanlines, CRT masks, and more advanced preset work are intentionally left out for now. We are currently experimenting extensively with the Morph 4K, exploring different settings, approaches, and use cases. As part of that process, we have launched a dedicated GitHub repository where we will be sharing our own custom Morph 4K presets.
Because this is still an active experimentation phase, results may vary and presets may change or evolve as we continue refining our setup. Nothing here is presented as final or definitive, this is very much a work in progress. Once we have fully dialed in our approach and gained a deeper understanding of the Morph 4K’s capabilities, we will follow up with more in-depth guides covering scanlines, masks, and preset design in detail.
This is just the beginning.
Visit the Morph4K wiki for a more indept overview of all its posibilities.
Thanks for the guide! It’s nice to have it all in one place condensed!
Late to the party, but this guide is exactly what I needed. My N64 core would go crazy when starting a game. This helps. Thanks!